v:* {behavior:url(#default#VML);} o:* {behavior:url(#default#VML);} w:* {behavior:url(#default#VML);} .shape {behavior:url(#default#VML);} Wolfchild Christian Christian 2 842 2006-10-30T09:58:00Z 2006-10-30T09:58:00Z 6 920 5245 43 10 6441 9.2812 21 ChuckRock ? Core Design How to single disk it.
What you need: Original/SPS release game Tools DiskX, DiskFiller & Propack (download from link in the tutorial) Some copy program like BurstNibbler/X-Copy
A few blank
disks AR3 cart. or ROM image Your question might be, why choose ChuckRock ? ? Cause it was an easy one..
The point here, is to fit the game on one disk. This can easily be done cause the game has a main file, that can be ripped and written to disk 2.
First of all, lets check disk 2 for any free space. For this purpose, DiskX is a good choice. It is a disk based Viewer/editor.
Start the program, insert a copy of disk 2 and choose ?DF0:? from file menu ?Unit?.
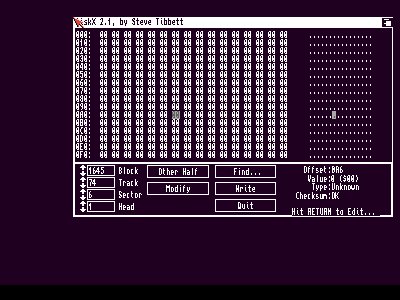
In lower left corner of the screen, try input value #79, under track & press enter. In right side of screen, you?ll see Contents of the actual track/block nr.
Under Block, try step down, you?ll still just see blank space. I can by now tell you, that when block 1645 is reached, you checked for enough free space. Block 1645 will be start of ripped main file. You can even step further down, and there are still free space ? for your own intro perhaps.
Next part is getting hand on the main file from disk 1.
Boot original disk 1. Core logo appears, after that the intro. We are not interested in either, so just so just skip them.
After the intro, game loads a while and asks for disk 2. So, the main file is perhaps loaded after the intro..
Reboot & Enter AR just after you have quit the intro. Game is now in progress loading main file. We must find what executes it, and take over this point, so we can rip it. After entering AR, press D + enter a few times, to disassemble memory.
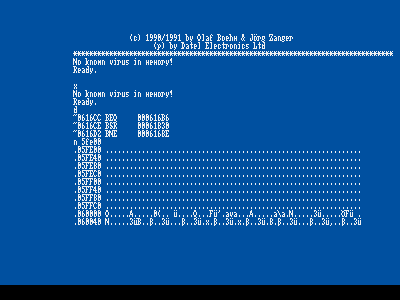
You will be somewhere in 60000 area of memory. This code must be the loader, cause game is in progress loading..
It would be interesting to find start of it and disassemble it. It might start at address 60000 (nice and round number).
From above pic, it sure looks to be starting at address 60000.
There is a good chance, that main file is executed by the loader, with a JMP instruction. If all JMP instructions are breakpointed, game will stop loading just before file is executed.
JMP instructions start with opcodes 4E F9, search for these & breakpoint them all & exit AR for continue loading:
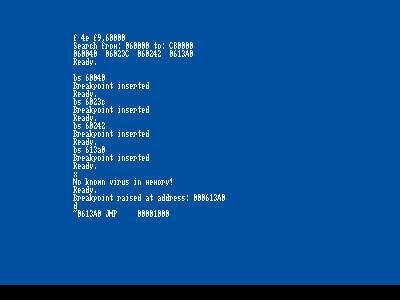
A breakpoint at address 613A0 will be raised. Press D+enter to see what the JMP calls, see above. Its address 1000.
Main file then starts at address 1000.
But where does it end ?
Hmm, we know the intro is quite big cause game loads a while & main file is also big, cause that also takes a while to load.
A way to find then end (not precise end) could be to take note of a memory location while intro runs, exit intro, let game Load main file, after that check that memory location again. If it has been overwritten, then main file is past that address, if memory is the same, then loader must end below that address..
Reboot game and enter AR when intro appears. See memory location 2B000 & 2C000:
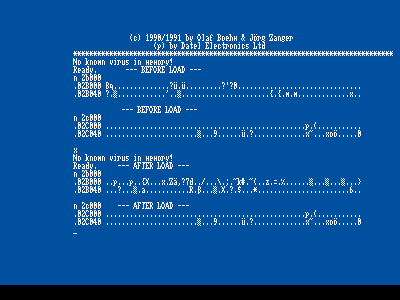
Exit AR, exit the intro and enter AR when game reg. for disk 2. Check memory again, see above.
Address 2B000 has changed, so main file is longer than 1000-2B000.
2C000 has NOT changed, so main file is below 2C000. If save range is set to 1000 ? 2C000, we are sure to have whole file with us.
Before saving anything, we must deal with the disk swapping routine & the copy protection.
First the disk swapping routine. Enter AR & insert disk 2. Read out the boot block: RT 0 1 70000.
See memory with N 70000 + enter. It seems like the disk has a ID, called ?CRD2?. Game code must be checking for this ID, to see if correct disk has been inserted. Try searching memory for the ID: FS ?CRD2?.
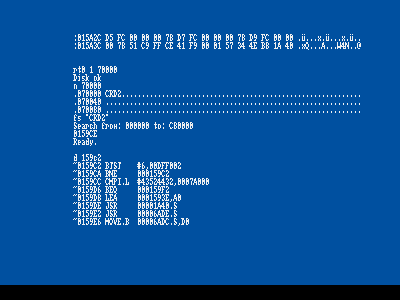
AR return address 159CE. Disassemble an address a few bytes before, see above. At address 159CC, game checks For the ID at address 7A000. Address 159D6 then branches on with loading, if ID matches.
If we change the BEQ (branch equal to) with just a BRA (always branch), game will always thing correct disk is inserted and not asking for disk 2.
Reload disk 1 and insert a breakpoint at address 613A0 when intro appears. After the intro & loading, breakpoint will raise. Main file is now in memory.
Change the BEQ at address 159D6 to a BRA, by inserting the hex value #60 (66=BNE,67=BEQ,60=BRA) & press enter, see below.
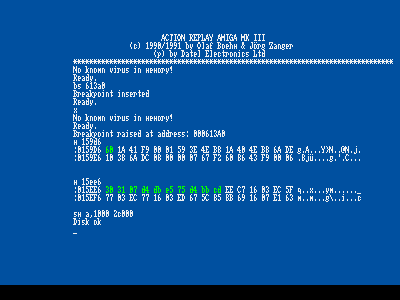
Then at address 15EE6, insert the opcodes above, marked with green & press enter. This will crack the protection.
If you want to know more about this, then read the cracking tutorial, also found on this nice site.
Save file to a blank disk: ?SM a,1000 2C000?.
Having a patched/cracked main file on disk, now it needs to be packed, so it fits on disk 2.
Copy file ?a? to the same disk as you have ProPack on & pack the file: PPAMI.EXE P M ?X1000 A.
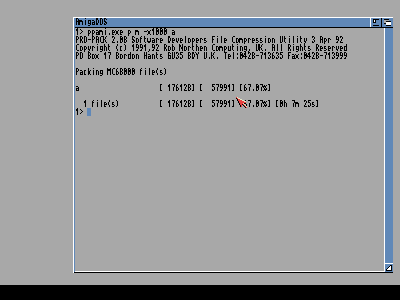
P=pack M=Motorola MC68000 files X-1000 decrunch at address 1000 (this packer can decrunch a file over itself) After a few mins, a new file called ?a.RNC? is generated ? a packed main file.
Next is writing file to disk. Start program ?DiskFiller?, after it?s started, insert copy of ChuckRock disk 2 in DF0: & disk with main file in DF1:
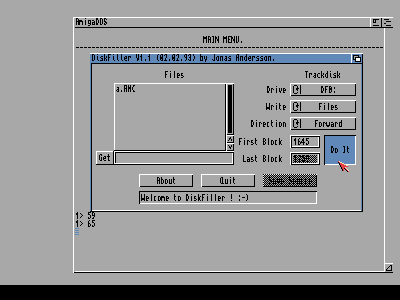
Press the ?Get? and point to file ?a.RNC? on DF1:. ? file to write.
Earlier, we found free disk space from block 1645, in field ?First Block? insert #1645 & press ?Do It?
& answer ?Yes? to next screen.
After writing, field ?Save Source? can be pressed. Save source somewhere and open the file with a TXT editor.
The source is telling us from which offset on disk to load from and the amount to load:
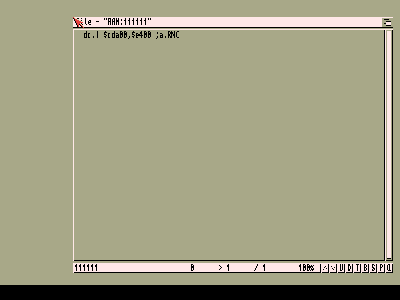
CDA00 is load offset & E400 is amount to load.
Final step is writing a boot loader, to load file into memory. File can not just be loaded directly to address 1000, cause when booting a floppy disk, the boot block code is moved into low chip (for an Amiga with exp. mem at C0000, usually boot starts at address 1558), which means main file would start overwriting the boot code and cause a crash.
Instead, we load file into much higher chipmem, set the computer in supervisor mode ? to gain full control & copy file down to address 1000.
Bootblock will end up look like this:
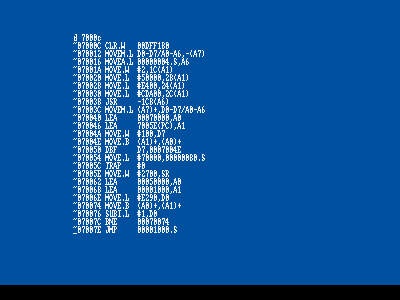
This boot block is just the same as the one used on WolfChild (except of offsets, of course), see that tut for more details.
You don?t need to program the boot yourself, it?s included for download in top of this page.
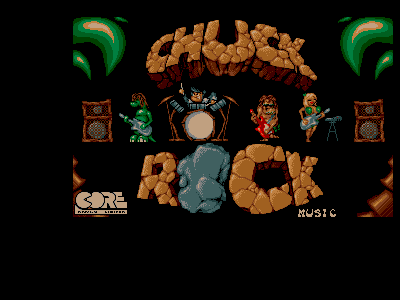
Boot disk and now you got ChuckRock on a single disk 🙂 Rob